


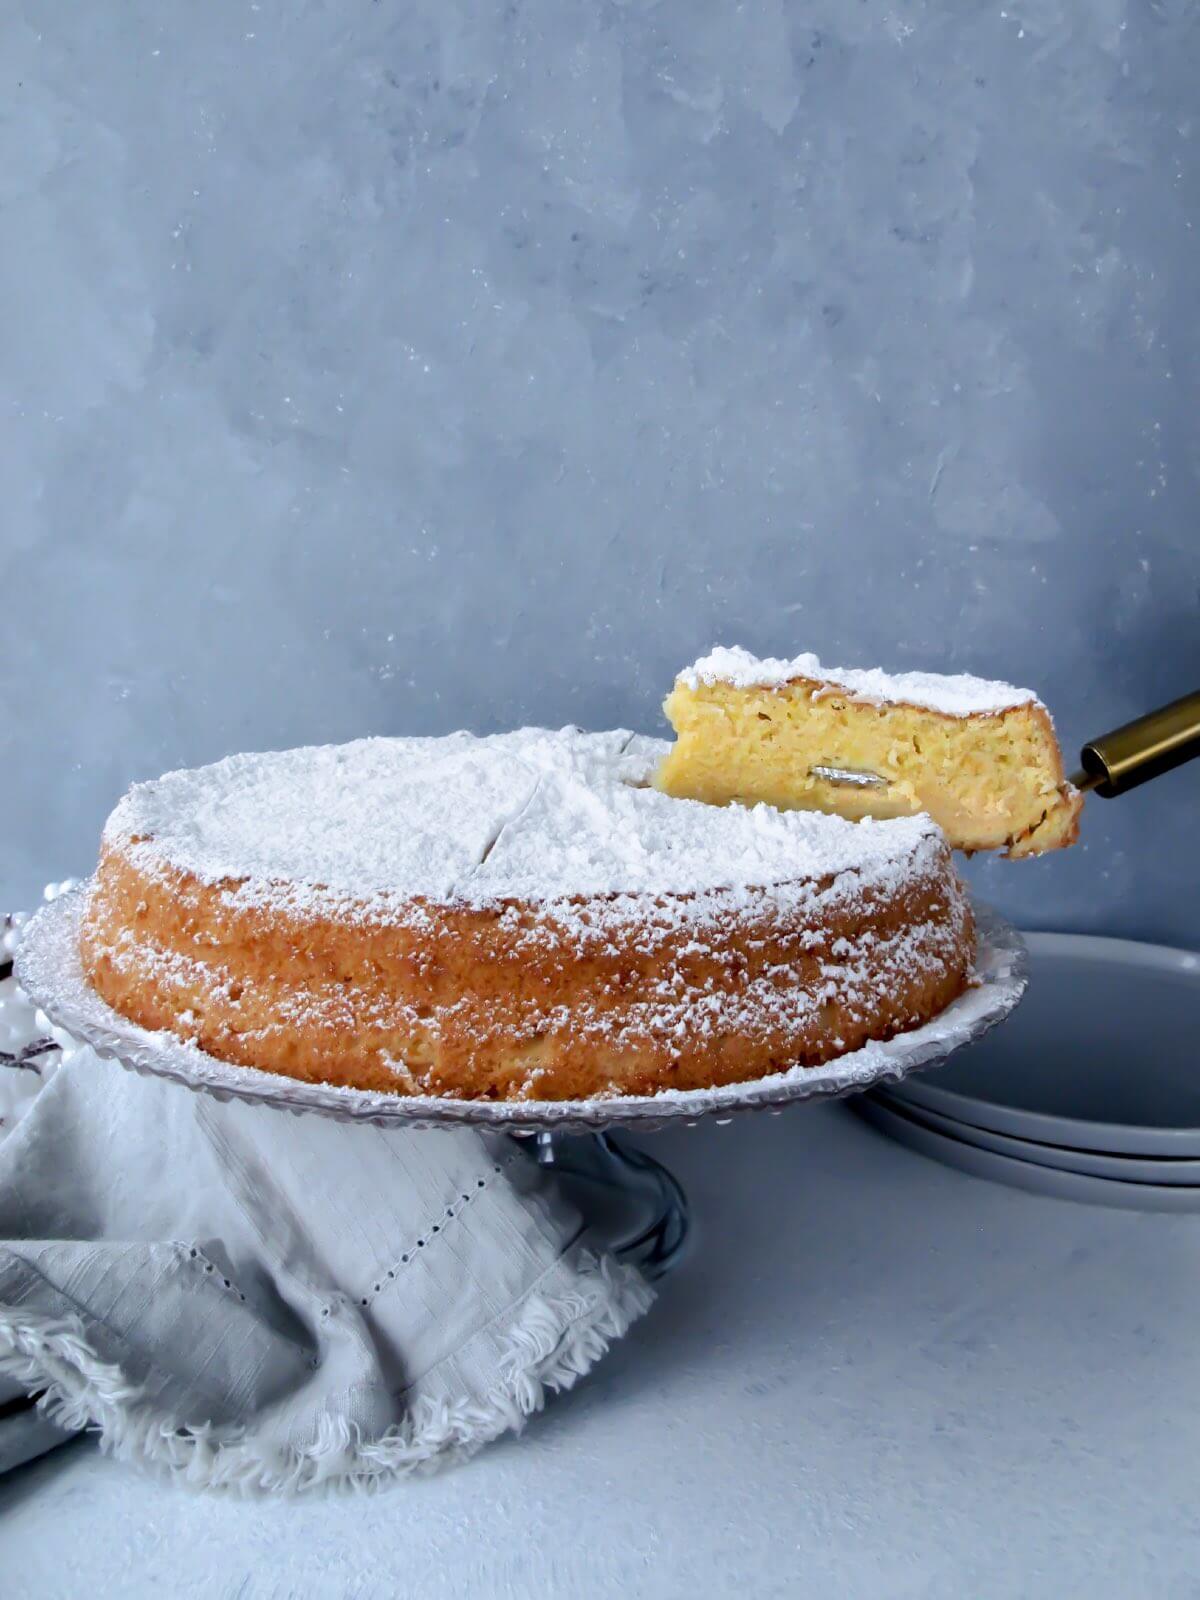
Vasilopita is a traditional Greek New Year’s cake. This is a recipe for the cake version of Vasilopita. With hints of orange and vanilla, this light and fluffy cake is delicious, and there’s the possibility of getting the lucky coin for good luck and fortune all year!
A coin is hidden inside the cake after it’s baked, and the person who gets the coin in their piece of vasilopita is said to have good luck for the upcoming year!
Making the vasilopita is one of my favourite Greek holiday traditions. On New Year’s Day, our family gets together for dinner, and then we cut the vasilopita. You could also cut the vasilopita at midnight on New Year’s Eve or in the morning on New Year’s Day. Vasilopita is pronounced as “vah-see-lo-pee-tah.”
The cake itself is relatively easy to make (I mean, as easy as making a cake can be, haha). And it’s fun to be creative with the toppings and how you design the vasilopita. My family usually writes the numbers of the new year on the cake with dried cranberries, smarties, or uses a stencil to cut out the numbers. But you can do a different stencil design, write Happy New Year, or just sprinkle the top of the cake with powdered sugar.
For this vasilopita recipe, you don’t need to worry about separating the eggs into yolks and whites and beating the egg whites on their own!
What Is The Meaning Of Vasilopita?
Vasilopita is made in Greek culture to celebrate the New Year and the life of Saint Basil (Vasilios in Greek). A hidden coin is placed inside the vasilopita, and whoever gets the piece of cake with the lucky coin is said to have good luck for the New Year!
RECIPE TIPS
The coin will be noticeable when eating the vasilopita, but it’s a good idea to remind everyone that there is a coin inside the cake, especially when serving this cake to small children or elderly adults. Here are a few tips so that you end up with a moist, flavourful, and light vasilopita that bakes properly!
- Room temperature ingredients. I almost wanted to write this in all caps because it’s so important! The butter, eggs, milk, and orange juice must be at room temperature. I know it’s exciting to rush into the recipe (trust me, I’ve done that too many times, haha), but the ingredients need to be at room temperature so that the batter doesn’t curdle, mixes easily, and bakes properly.
- If you’re short on time, you can gradually heat up the butter in the microwave in 5-second intervals. You want it soft enough where the butter indents if you press it, but not too soft where there is no structure to the butter or it’s melted.
- To quickly bring the eggs to room temperature, you can place the eggs in a bowl with warm water for 5 minutes. The water shouldn’t be hot. Otherwise, the eggs may start to cook. The milk can be heated in the microwave so that it’s warm but not hot (you can dip your finger in the milk without pulling it away).
- The most common cause of curdled cake batter for vasilopita is cold eggs, milk, or orange juice. When cold ingredients are added to the room-temperature batter, they bring down the temperature of the entire mixture. Also, the cold temperature causes the fat to solidify and turn into little chunks. If the milk and orange juice are cold, you can put them in the microwave for 5 seconds at a time until they are at room temperature.
- Creaming the butter and sugar together helps to create a fluffy cake since this process beats air into the butter, and the sugar helps to trap little pockets of air. You only need to cream the butter and sugar together for 2-3 minutes. Most of the gas bubbles are created during this creaming process, creating texture and a cake that will rise beautifully.
- If you overcream the butter and sugar, the mixture will separate and become grainy. How do we know when butter and sugar are perfectly creamed? The butter and sugar will become a pale yellow colour (not white), and you won’t notice the sugar granules as much. The butter and sugar mixture will increase in volume and become light and fluffy when creamed together.
- Adding eggs to the creamed butter and sugar is called emulsifying because these ingredients normally don’t mix well together. In this step, we’re emulsifying the ingredients, which means ingredients that normally don’t incorporate together. Going slowly gives a better chance of emulsifying the eggs with butter and sugar without the batter curdling.
- If the batter does curdle, quickly add a few tablespoons of the flour mixture to the batter and then continue adding the eggs. The important step here is to go slowly when adding the egg mixture. Allow the butter and sugar to mix with the egg for 10 seconds before adding more of the egg mixture. Patience really is the key here!
- If the eggs are added too quickly, they will curdle with the fat in the butter. Allow 45-60 seconds between adding each egg so that they can incorporate into the creamed butter and sugar.
- We will alternate between the flour, milk, flour, and orange juice when adding the dry ingredients. Lower the speed of your mixer once you start adding in the flour. Start with the flour and end with the flour. So dry, wet, dry, wet, dry.. etc. Once all the flour is incorporated and you can no longer see any flour, turn off the mixer. You can do a couple of stirs with the spatula to ensure there aren’t any lumps in the batter.
- Don’t open the oven during baking, especially during the first 45 minutes, since the change in temperature may cause your cake to go flat. When the cake is almost done, you can remove the cake from the oven and insert a toothpick or small sharp knife into the centre of the cake. If it comes out with just a few little crumbs, the vasilopita cake is ready, and you can remove it from the oven. It will continue to cook as it cools.
INGREDIENT NOTES
Unsalted butter: As mentioned above, the unsalted butter must be at room temperature. When making this recipe, I usually leave the butter out overnight so that it has time to come to room temperature. This is really important! Softened butter will cream more easily with sugar, resulting in a fluffier batter and a lighter cake.
Eggs: The eggs must be at room temperature so they can be mixed with the butter and sugar more easily. Cold eggs affect the temperature of the batter since they bring down the temperature of the cake batter. Also, if the eggs are cold, they will curdle the cake batter since the butter (fat) will seize.
Metaxa brandy: Metaxa brandy is an amber-coloured Greek liqueur with a beautifully sweet and smooth taste. If you don’t have Metaxa brandy, you can use another type of brandy, cognac, or brandy extract instead.
If you use brandy extract, you’ll only need about 1/2 a tablespoon since the taste is much stronger than brandy. Then, add an additional 2 1/2 tablespoons of orange juice to the cake batter if using brandy extract. Or opt for no brandy and simply use three tablespoons extra of fresh orange juice in its place.
Baking powder: Make sure the baking powder hasn’t expired. You can test a small amount in a glass. Add a teaspoon of baking powder and pour in about 1/4 cup of warm water. The baking powder should start to fizz. You’ll need to get some new baking powder if it doesn’t. From experience, testing it out beforehand is better than making a whole cake with expired baking powder.
Navel oranges: I find that navel oranges are great to use for baking recipes. Zest the orange first, then cut it in half to squeeze the juice. I like to strain the fresh orange juice so there’s no pulp. The orange juice will need to be at room temperature. If the oranges are stored in the fridge and the juice is cold, it will lower the temperature of the cake batter, which may result in the batter curdling and a longer bake time.
Whole Milk: The milk will need to be at room temperature, or you can heat it up in the microwave so it’s slightly warm (but not hot). If the milk is cold, it may curdle the batter and will bring down the temperature of the cake batter, which will impact the baking time. Adding whole milk to the cake adds flavour, helps brown the cake, and adds protein, fat, sugar, and sweetness to the vasilopita!
Vegetable oil: You’ll want to use lighter vegetable oil that doesn’t have a strong flavour, but oil adds moisture and helps create a fluffy cake!
HOW TO MAKE VASILOPITA: STEP BY STEP
STEP 1: Prepare the dry ingredients. Zest and juice the oranges. Set aside. Sift the flour into a large bowl. Mix in the baking powder, cinnamon, orange zest, and salt to the bowl with the flour.
Lightly grease the bottom and the sides of a 10″ baking pan with a little bit of unsalted butter and a dusting of flour or line the baking pan with parchment paper. Too much butter in the greased pan will cause the outside of the cake to become crispy. Preheat the oven to 350°F on bake.
STEP 2: Prepare the wet ingredients. Add the softened unsalted butter and vegetable oil into a mixing bowl. Use the whisk attachment and cream the butter and oil on medium speed (#6 on a KitchenAid mixer) for 2 minutes. Turn off the mixer and use a spatula to scrape down the sides of the mixing bowl and the paddle attachment.
Turn on the mixer again to medium speed and slowly add all of the white sugar to the mixing bowl. Cream the butter, oil, and sugar on medium speed (#4 on a KitchenAid mixer for 30 seconds). Turn off the mixer and scrape the sides and the paddle. Turn on the mixer, increase the speed to #6 on a KitchenAid mixer, and cream the butter, oil, and sugar on medium speed for 1 minute and 30 seconds. Turn off the mixer, scrape down the sides, and paddle.
STEP 3: Add in the eggs. Turn the mixer on medium speed and add one egg at a time. Allow the egg to incorporate into the mixture for 45-60 seconds before adding in the next egg. Repeat this process until all four eggs are added. Then add in the vanilla extract and brandy. If you add the eggs too fast, there is a risk that the emulsion never properly forms.
If the eggs are too cold when added to the creamed butter, oil and sugar, the butter will harden, little lumps will form, and the mixture will curdle. To prevent curdling, it’s important not to add all of the eggs at once. If the batter is curdled, then the emulsion has split. If this happens, quickly add 2-3 tablespoons of the flour mixture to the creamed butter and continue adding eggs.
STEP 4: Combine dry ingredients with wet ingredients. Next, we’re going to alternate between the dry and wet ingredients. Lower the speed of the electric mixer to #2 on a KitchenAid mixer when you add the flour. Now, it’s time to alternate: start with flour, milk, flour, orange juice, flour, milk, flour, etc. and end with flour. Repeat this process until everything is incorporated.
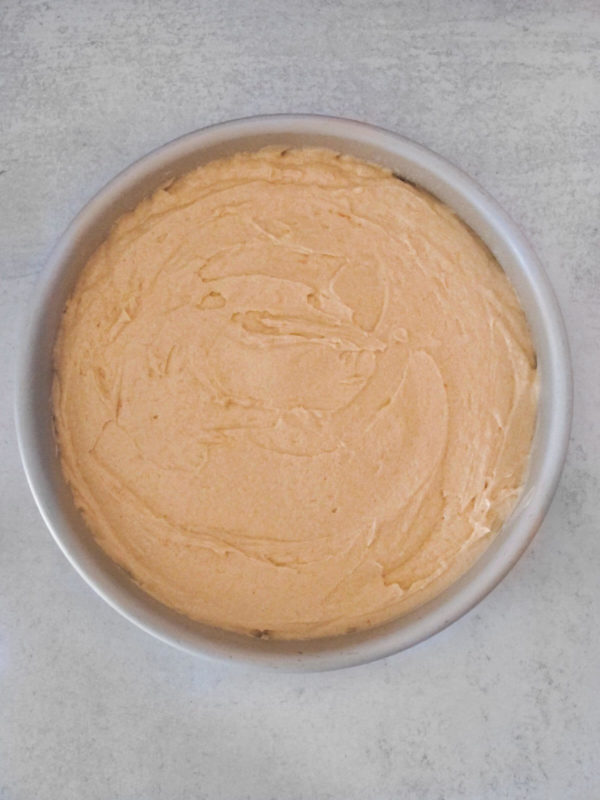
Once you can no longer see any more flour, turn off the mixer. Use a spatula to mix the batter one final time, and then pour the cake batter into the greased pan. Lightly tap the cake pan against a kitchen counter a few times and swirl the cake pan so that the batter can spread evenly and any excess air pockets are removed.
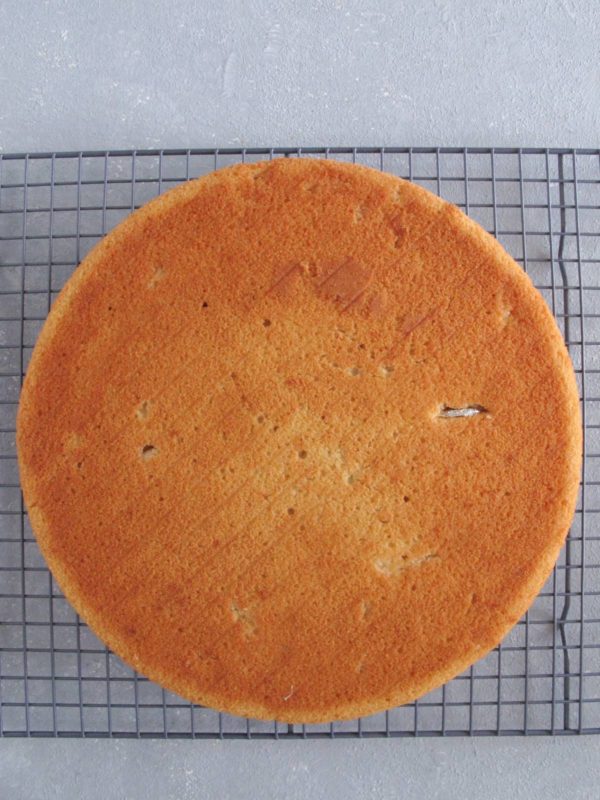
STEP 5: Bake the vasilopita at 350°F. Place the cake in the second to the bottom rack of your preheated oven. Slowly close the oven door. Bake the vasilopita for 50-60 minutes. To test if the vasilopita is done, insert a sharp knife or toothpick in the center of the cake. If it comes out mostly clean, then the cake is done. Allow the cake to cool in the pan for a few minutes before transferring the cake to a cooling rack.
STEP 6: Clean the lucky coin. Wash a small coin with soap and pat dry. Wrap the coin tightly with tinfoil or aluminum foil. Now, for the fun part, carefully insert the coin into the bottom of the baked cake. You can use a quarter, loonie, toonie, or another small coin of your choice. Try not to place the coin directly in the centre of the cake, or it may be hard to tell which slice the coin ends up in when the cake is sliced. You won’t be able to tell where the coin was inserted once you flip the cake over again.
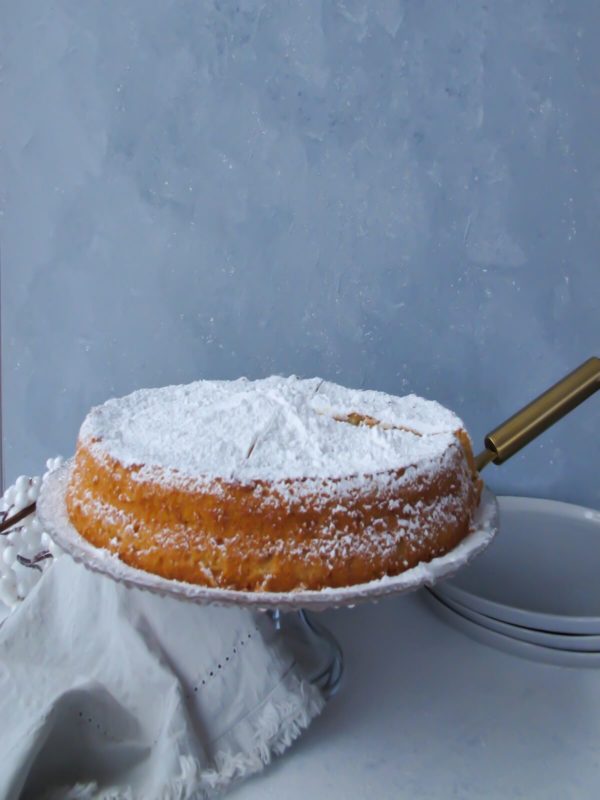
STEP 7: Sprinkle the vasilopita with icing sugar. Dust the top of the vasilopita with a generous amount of icing sugar. You can create a cutout stencil design with the year, write the numbers of the year with dried cranberries or chocolate chips or leave it plain with icing sugar. Traditionally, the numbers of the upcoming year are written on top of the cake.
STEP 8: Cut the vasilopita. The family’s eldest member will usually slice the pieces of the vasilopita. Normally, the order of the cake pieces starts with God, the house, the business/work, and then the family members from oldest to youngest. If you have more space, you can add relatives or friends if they’re celebrating the New Year with you. Whoever gets the lucky coin is said to have good luck for the new year!
Why Is My Cake Dense?
Using room temperature ingredients is important since creaming the butter causes it to trap air. The trapped air, when baking, expands and creates a fluffy cake. But you don’t want to over cream the butter and sugar because trapping too much air will cause the cake to rise rapidly and then deflate in the oven.
For best results, only cream the butter and sugar together for a few minutes. Once the dry ingredients come in contact with the wet ingredients and are mixed together, gluten starts to develop. Overmixing can lead to a dense cake so not over-mixing the cake batter will result in a fluffy and light cake!
A common reason is that the cake may be underbaked. If it’s not fully baked, then it may not set properly, which would cause the middle to sink. Other reasons include incorrect oven temperature or too many leavening agents like baking powder or baking soda. This can cause your cake to rise too rapidly and then sink in the middle.
Overbaking a cake is one of the main reasons why cake becomes dry. Another reason may be adding too much flour to the batter. When measuring the flour, use a spoon or pour the flour into the measuring cup. Don’t scoop the flour with the measuring cup.
Gently tap the cake pan against the kitchen counter a few times and swirl the cake pan before placing the cake in the oven so that any excess air pockets are removed. Also, it’s important that your oven has enough time to preheat so that you can place the cake in the oven right away. Some air bubbles are common as the leavening agents are working. The good news is that any imperfections will be covered with icing sugar!
STORING & SERVING
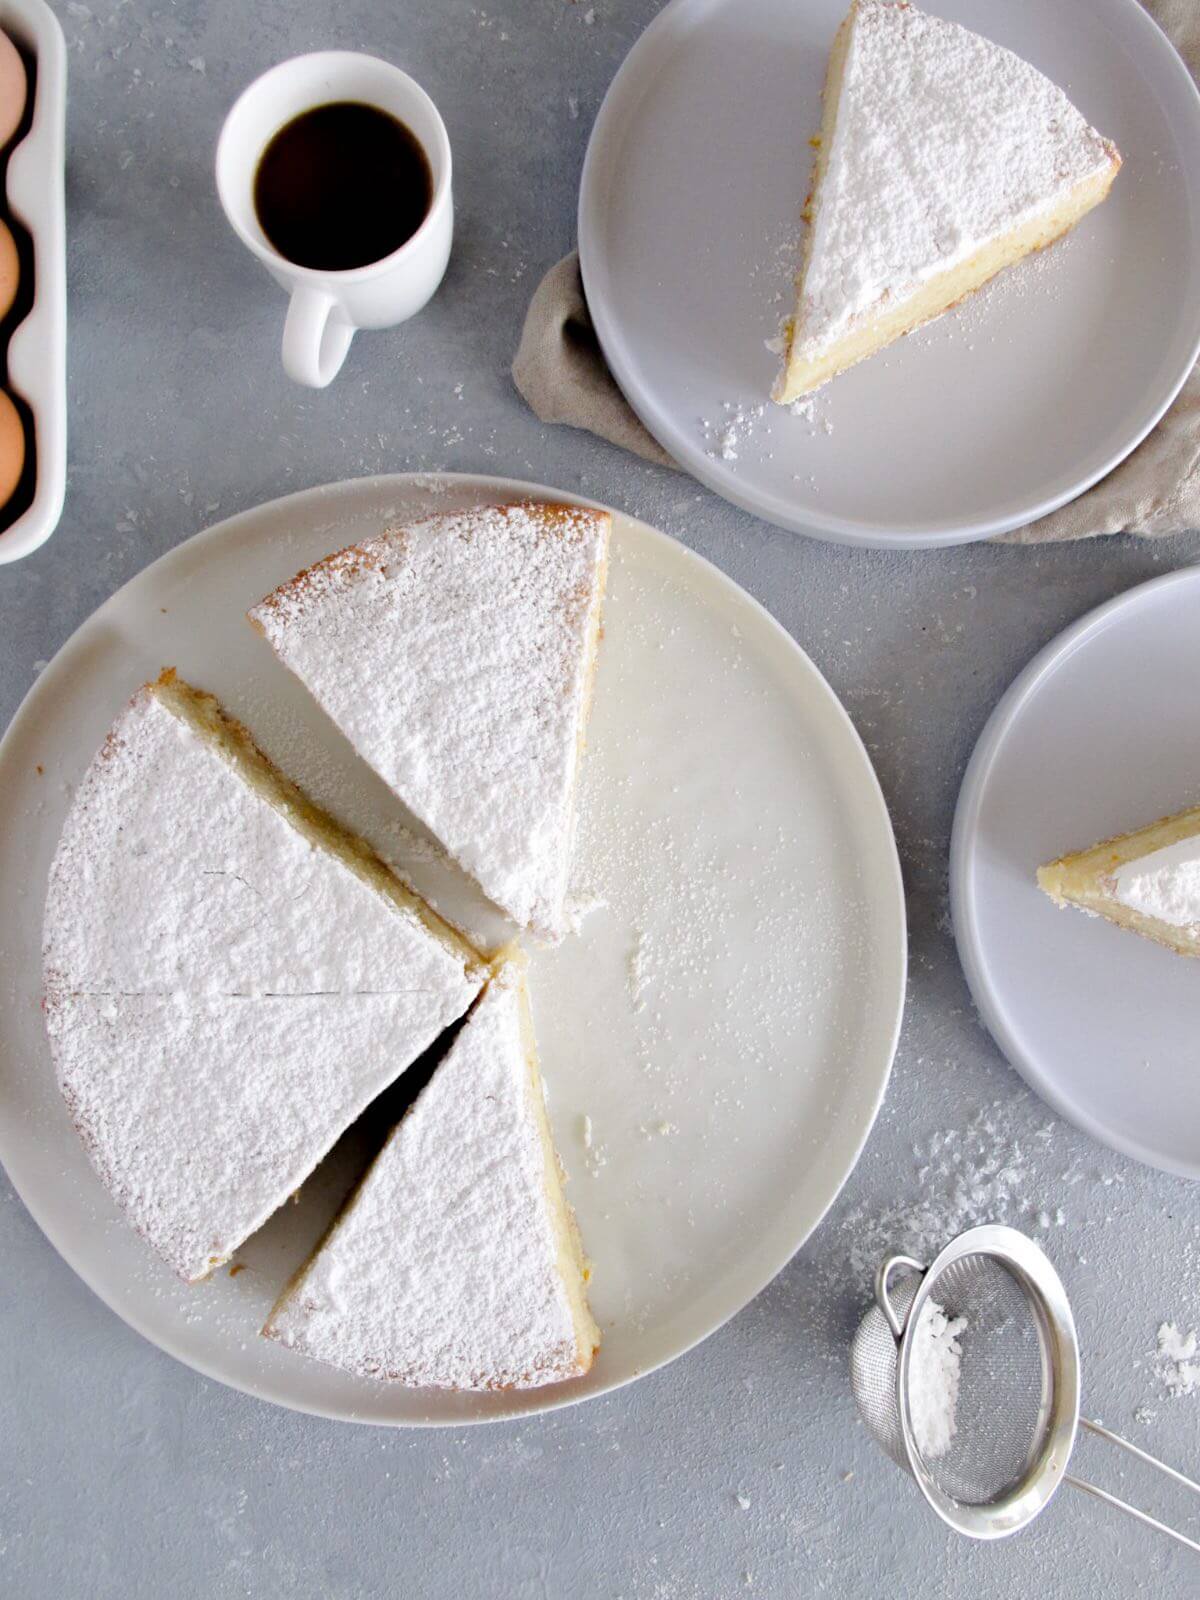
Vasilopita is best served at room temperature. You could serve vasilopita with vanilla ice cream or fresh whipped cream for a more indulgent dessert, but traditionally, it’s enjoyed on its own with icing sugar. Vasilopita is often enjoyed with fresh coffee or tea on New Year’s Day. Vasilopita can last at room temperature for 3-4 days, covered tightly with plastic wrap or in an airtight container. Wishing you and your loved ones a very Happy New Year!
- How Long Does Cake Last?
- Fresh Apple Spice Cake
- Irresistible Greek Ekmek With Kataifi
- Surprising Benefits of Greek Mountain Tea

Greek New Year’s Cake (Vasilopita Recipe)
Equipment
- Electric stand mixer and large mixing bowl with the paddle attachment
- 10" x 2" round baking pan (light-coloured)
- Citrus zester and juicer
Ingredients
- 1/2 cup unsalted butter room temperature
- 1/2 cup vegetable oil
- 1 ½ cups white sugar
- 4 eggs room temperature
- 2 tablespoons pure vanilla extract
- 1 oz Metaxa brandy 2 tablespoons
- 3 cups all-purpose flour
- 2 ½ teaspoons baking powder level
- 1/4 teaspoon salt level
- 1/2 teaspoon cinnamon level
- 1 tablespoon orange zest about two navel oranges
- 1 cup whole or homogenized milk room temperature
- 1/3 cup fresh orange juice room temperature
- 1/2 cup icing sugar to dust on top of the vasilopita adjust to taste
- one small coin washed and wrapped in aluminum foil
Instructions
- Prepare the dry ingredients. Zest and juice the oranges, setting them aside seperately. Lightly grease a 10" round baking pan with butter and dust with flour, or line with parchment paper. Sift the flour into a large bowl, then stir in the baking powder, cinnamon, orange zest, and salt. Preheat the oven to bake at 350°F.3 cups all-purpose flour, 2 ½ teaspoons baking powder, 1/4 teaspoon salt, 1/2 teaspoon cinnamon, 1 tablespoon orange zest
- Prepare the wet ingredients. In a mixing bowl, combine softened butter and oil. Using a stand mixer with a paddle attachment, cream on medium speed for a couple of minutes. Scrape down the bowl and paddle, then resume mixing on medium speed while gradually adding the sugar. Continue creaming for a few minutes until the mixture is light, fluffy, and pale in colour. Scrape the bowl and attachment again to ensure everything is well incorporated.1/2 cup unsalted butter, 1/2 cup vegetable oil, 1 ½ cups white sugar
- Add in the eggs. Set the mixer to medium speed and add one egg at a time, mixing for 45-60 seconds between each egg addition. Repeat until all four eggs are fully incorporated. Add the vanilla extract and brandy. To avoid curdling, ensure eggs are at room temperature and add them gradually. If added too quickly or while too cold, the mixture may split. If curdling occurs, add 1-2 tablespoons of the flour mixture to stabilize the batter, then continue adding the remaining eggs.4 eggs, 2 tablespoons pure vanilla extract, 1 oz Metaxa brandy
- Alternate between dry ingredients and wet ingredients. Reduce the mixer speed to low and alternate between adding the dry and wet ingredients: start with some of the flour mixture, then milk, more flour, then the orange juice, and finish with the remaining flour mixture. Mix just until no flour is visible. *Do not start with the orange juice or the batter will curdle.*Turn off the mixer and give the batter a final mix with a spatula, scraping down the paddle, sides and bottom of the bowl. Pour the batter into the prepared pan, tap it lightly on the counter to release air bubbles, and swirl the pan to spread the batter evenly.3 cups all-purpose flour, 1 cup whole or homogenized milk, 1/3 cup fresh orange juice
- Bake the vasilopita at 350°F. Place the cake on the second-to-bottom rack of your preheated oven and gently close the door. Bake for 50-60 minutes. To check doneness, insert a toothpick or knife into the center of the cake. If it comes out mostly clean, the cake is ready. If the edges of the cake start to pull away from the sides of the pan then it's also ready. Let the cake cool in the pan for a few minutes before transferring it to a cooling rack.
- Clean the lucky coin. Wash a small coin with soap and dry it thoroughly. Wrap it securely in aluminum foil and gently insert it into the bottom of the baked cake. Use a coin like a quarter, loonie, or toonie. Avoid placing it in the center of the cake because it may be hard to tell which slice the coin ends up in when the cake is sliced. Once the cake is flipped back over, the coin will be hidden.one small coin washed and wrapped in aluminum foil
- Sprinkle the vasilopita with icing sugar. Dust the vasilopita generously with icing sugar. For a decorative touch, you can stencil the upcoming year using a cutout, arrange the numbers with dried cranberries or chocolate chips, or simply leave it plain with icing sugar. Traditionally, the upcoming year is displayed on top to celebrate the New Year!1/2 cup icing sugar to dust on top of the vasilopita
- Cut the vasilopita. The eldest family member traditionally slices the vasilopita, starting with pieces for God, the house, the business or work, followed by family members from oldest to youngest. If there's more cake, include slices for relatives or friends celebrating with you. Whoever gets the lucky coin is said to have good luck and fortune for the New Year!
Notes
- Room temperature ingredients. The butter, eggs, milk, and orange juice must be at room temperature, so the batter doesn’t curdle, mixes easily, and bakes properly.
- Cream the butter, oil, and sugar together. This process helps to create a fluffy cake since air is beaten into the butter, and the sugar helps to trap little pockets of air. You only need to cream the butter and sugar together for a few minutes.
- Add the eggs slowly to the creamed butter, oil, and sugar. Add one egg at a time to the creamed butter and sugar. Allow each egg to incorporate with the creamed butter, oil, and sugar before adding another egg to the mixture. If the eggs are added too quickly, they will curdle with the fat in the butter. Allow about 30-45 seconds in between adding each egg.
- When adding the dry ingredients, we will alternate between flour, milk, flour, orange juice, flour, milk, flour, etc. Start with the flour (dry) and end with the flour (dry).
- Don’t open the oven during baking. Especially during the first 45 minutes, since the change in temperature may cause your cake to go flat.
Nutrition
Date Published: December 20, 2022


5
Thank you! Happy New Year!