


You’ll only need a few basic ingredients and less than 5 minutes of cooking time. The end result? Fluffy, easy, warm homemade pita bread that is truly irresistible!
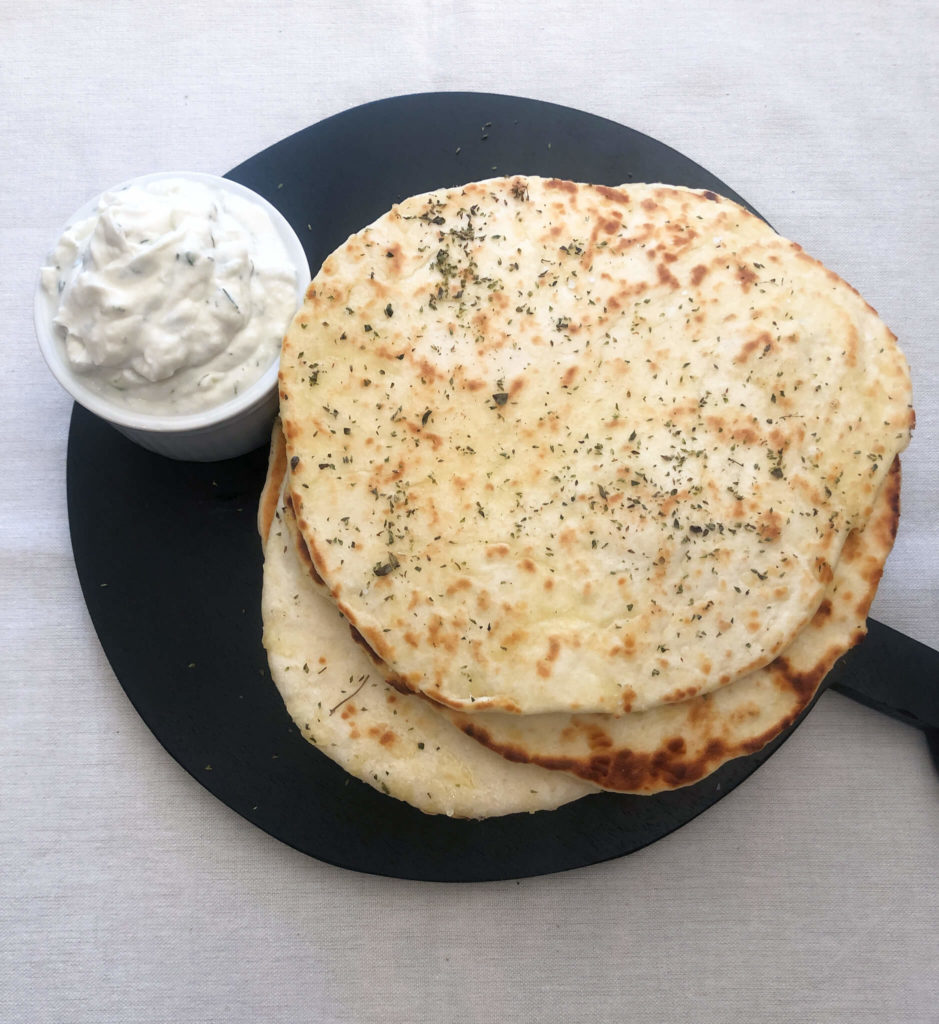
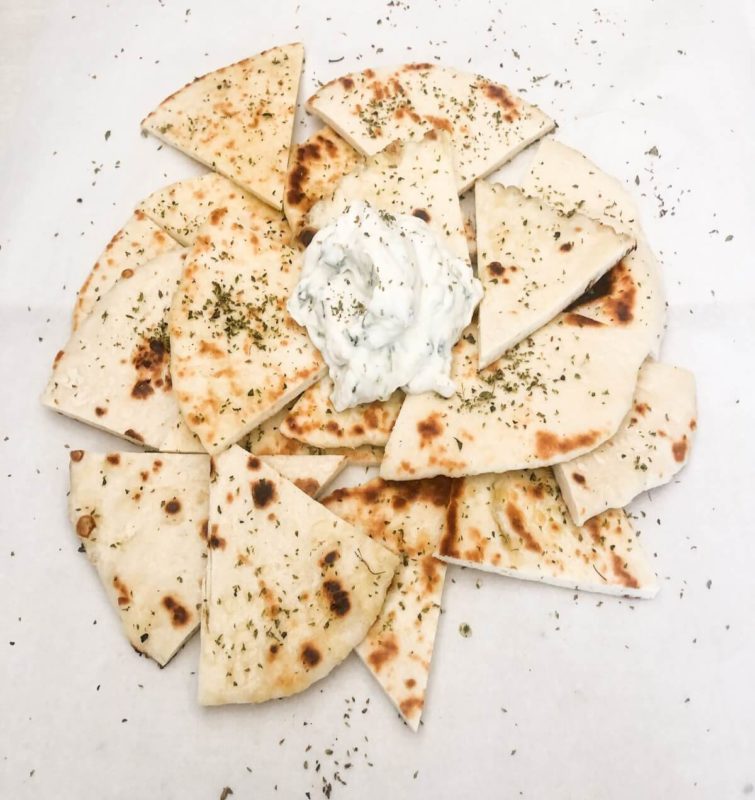
If you’d like, you can cut the pita bread into smaller triangles to serve with Greek dips like houmous or creamy sour cream tzatziki or use it to wrap your gyros or souvlaki.
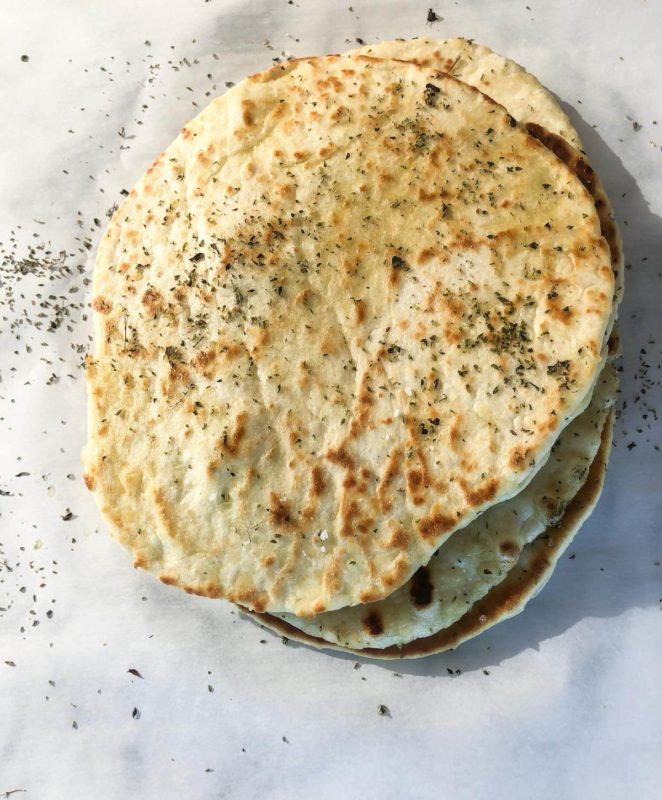
The buttermilk and baking soda in this recipe creates a slightly doughy texture while the outside becomes crispy. Brush your cooked pita bread with olive oil and sprinkle with dried oregano and sea salt for an elevated snack or appetizer.
HOW TO MAKE PITA BREAD: STEP BY-STEP
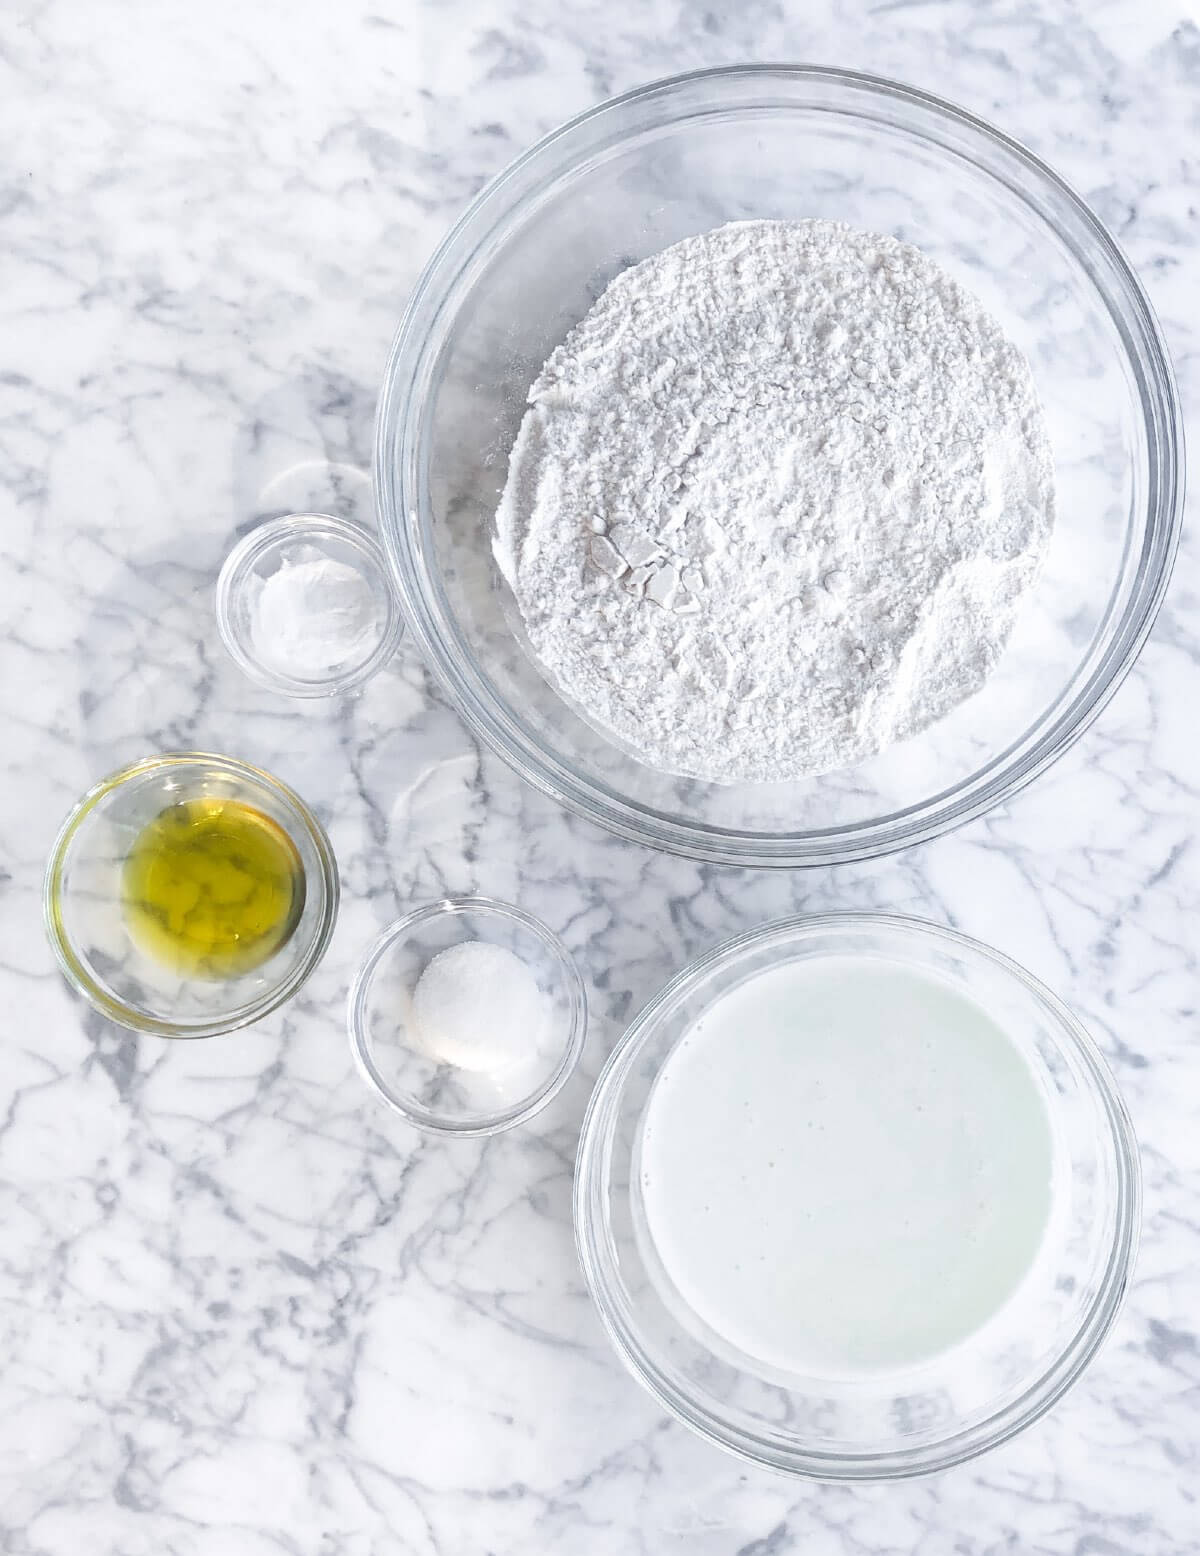
STEP 1: Mix the dry ingredients together (flour, sugar, salt, baking soda) in a large bowl and set aside.
STEP 2: Heat the buttermilk in the microwave or a small saucepan until it’s lukewarm. Buttermilk is acidic and an important ingredient because it activates baking soda and helps to create doughy pita bread!
STEP 3: Transfer the lukewarm buttermilk to a mixing bowl. Add in the olive oil. Using an electric stand mixer with a dough hook attachment, slowly add the flour mixture to the buttermilk and mix on medium speed for about 2-3 minutes or until the dough is mixed.
STEP 4: Remove the dough from the mixing bowl and knead it into a ball. Place the dough inside a lightly oiled bowl. Even though this recipe does not contain active dry yeast or dry instant yeast, it’s a good idea to cover the smooth dough ball with a clean kitchen towel and let it rest for 15 minutes at room temperature. Allowing the dough to “settle” will make it easier to roll into circles.

STEP 5: Prepare a clean work surface. It could be a kitchen countertop or dining room table. Sprinkle the clean surface lightly with flour to prevent the dough from sticking to the surface.
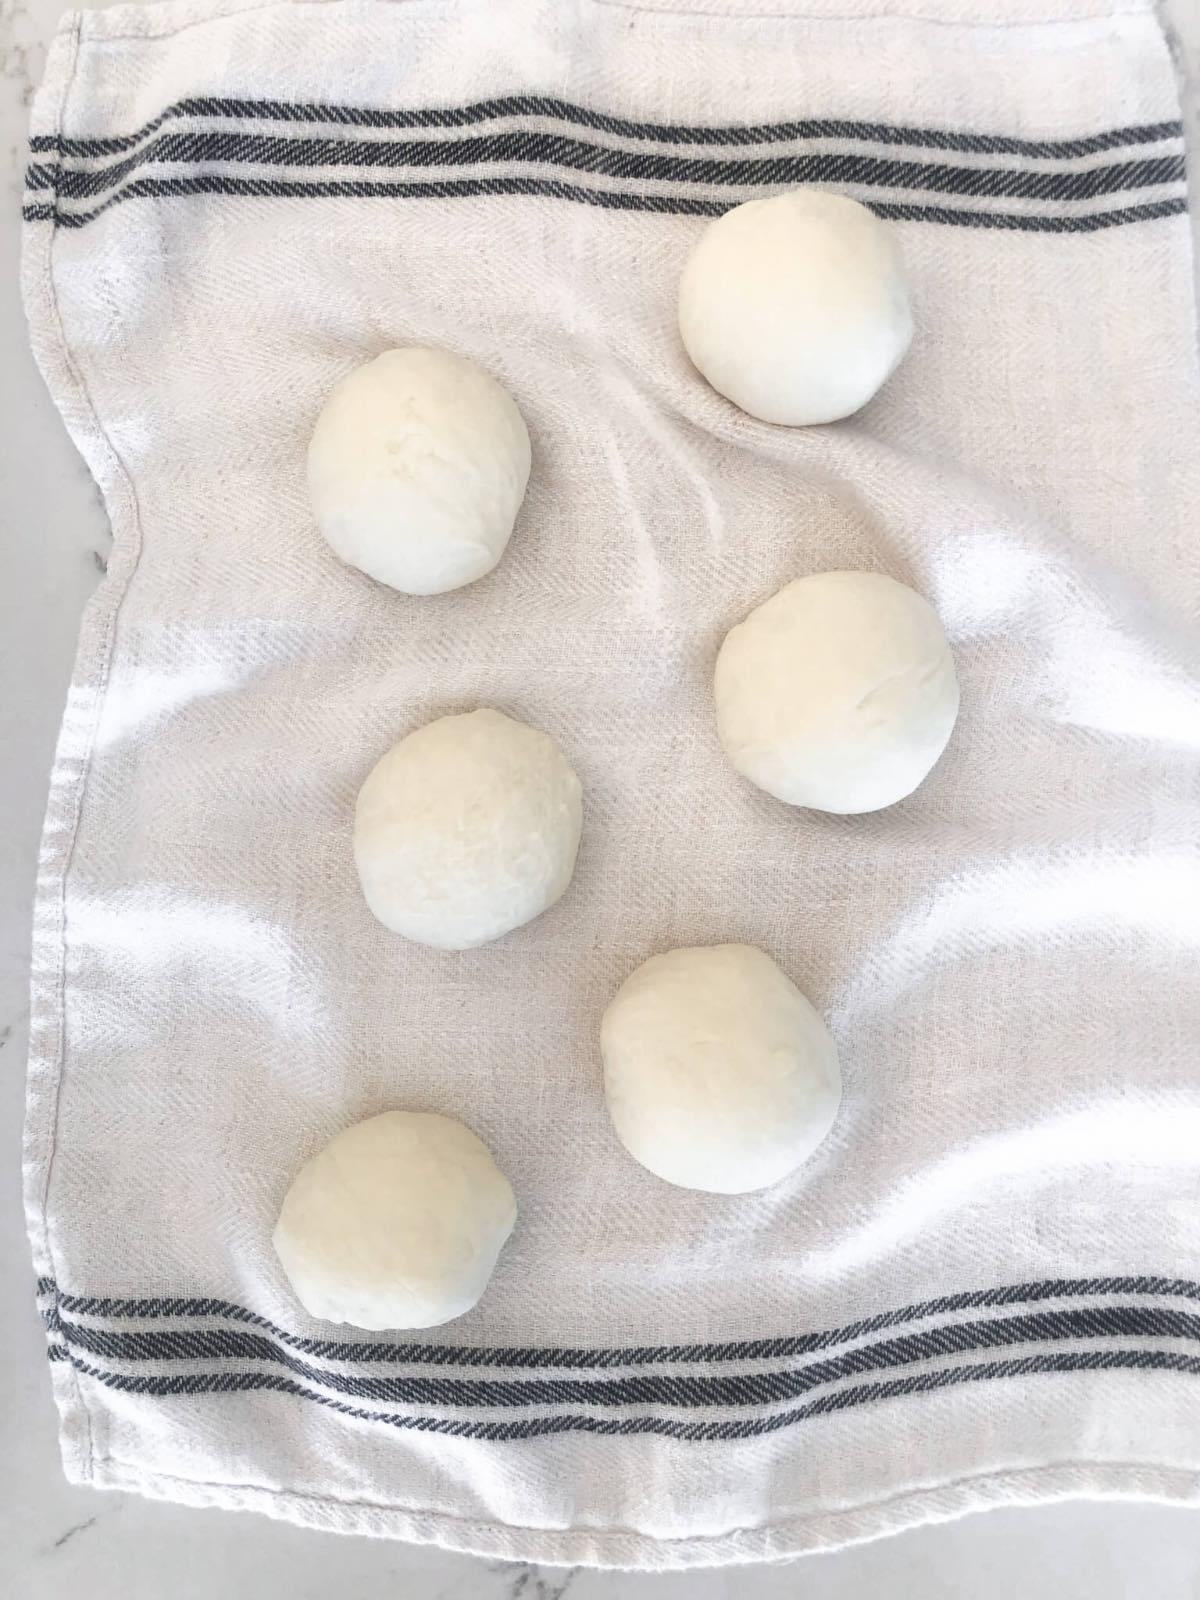
After 15 minutes, remove the pita bread dough from the bowl and use your hands to knead it on a clean, lightly floured surface. Next, cut the dough into six pieces and roll them into evenly sized-balls.
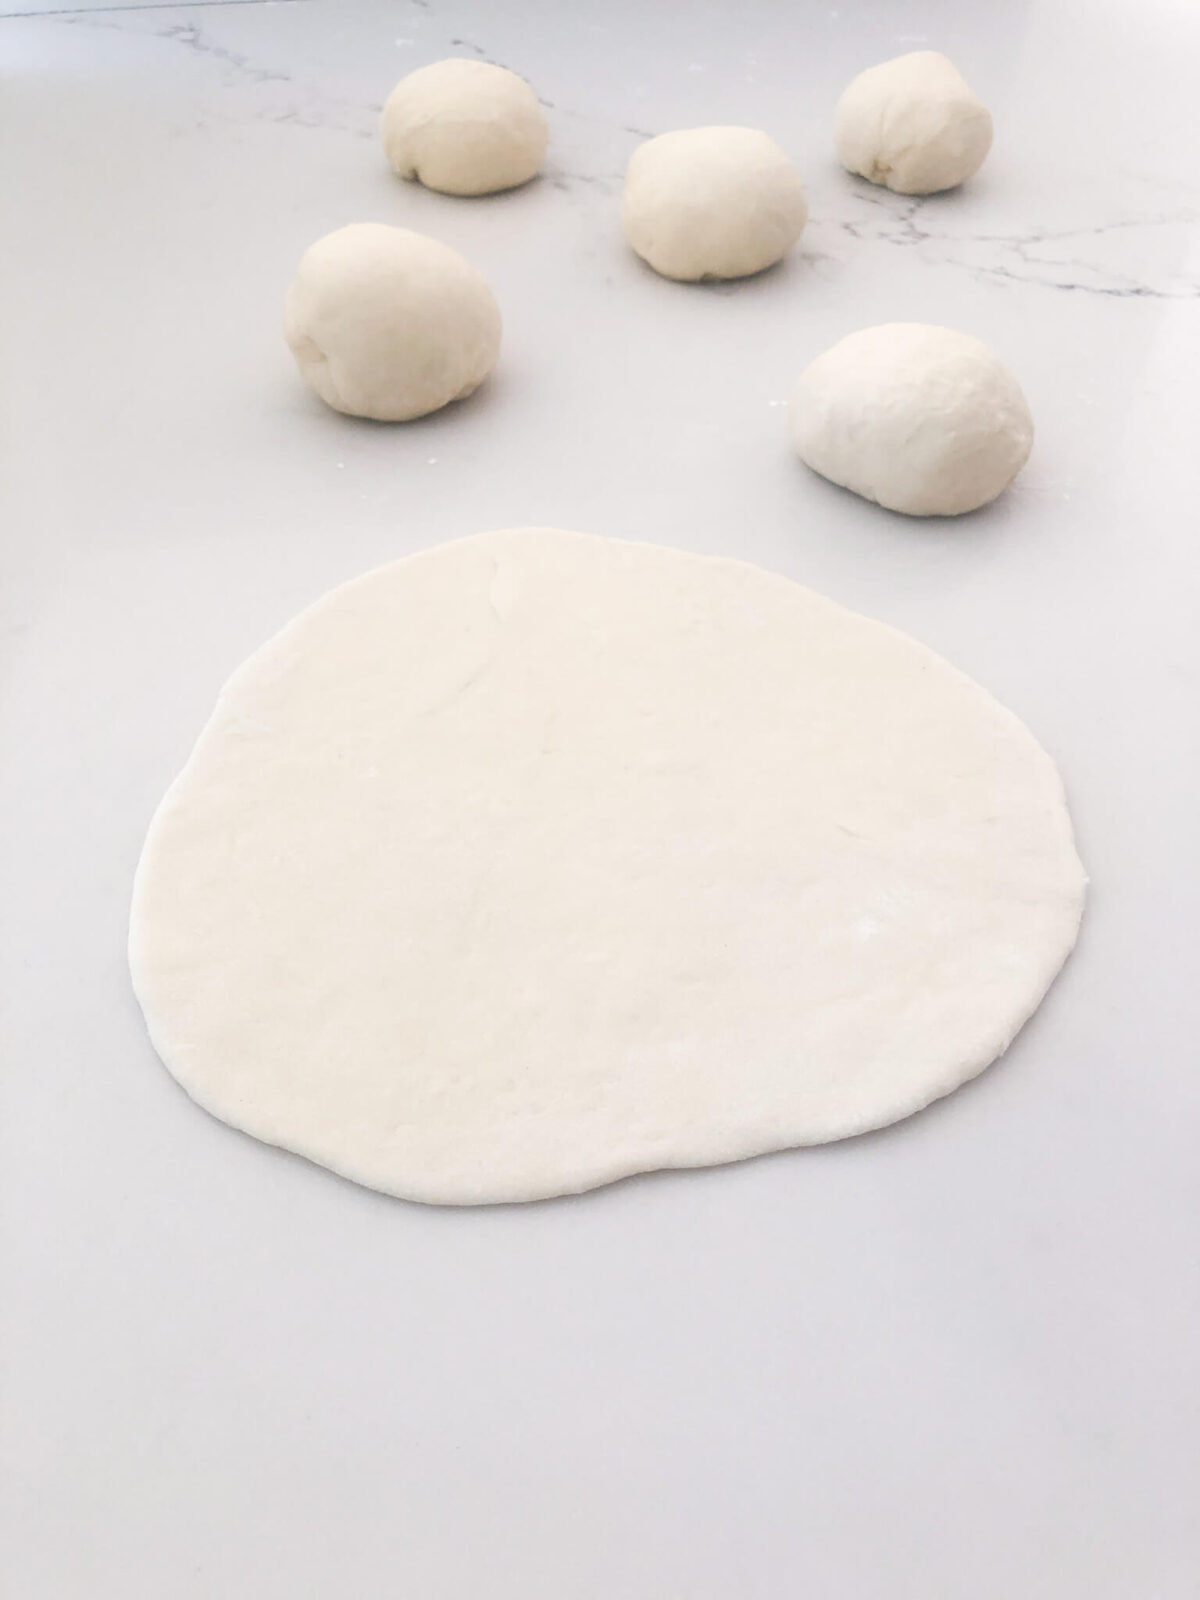
STEP 6: Roll the dough balls into flat circles using a rolling pin. The thickness of the dough will depend on how you like your pita bread. The thinner the dough, the crispier your pita bread will be.
STEP 7: Heat about 1 teaspoon of oil in a nonstick frying pan. Place the rolled dough in the heated nonstick pan and cook for 1-2 minutes on each side on medium heat. Keep an eye on the pita bread and have a slotted spatula on hand so that you’re ready to flip it over.
STEP 8: Repeat this process until all the dough is used. Place the cooked pita bread on a separate plate. Wrap the cooked pita bread with a clean cloth or aluminum foil while the remaining pita bread cooks so that it can stay warm.
STEP 9: Brush the cooked pita bread with olive oil or melted butter and sprinkle with dried oregano and sea salt.
What Goes Well With Pita Bread?
There are so many great options! Pita bread is so versatile. For example, you can use homemade pita bread to make chicken or pork souvlaki wraps and gyros.
Enjoy pita bread as an appetizer with tzatziki or other popular Greek dips, such as taramasalata, tirokafteri, or fava.
Pita bread is an excellent addition to Greek salad, meatballs with marinara sauce, or dinner options like mousaka or pastitsio. Or, even enjoy warm homemade pita bread on its own!
How To Store Pita Bread?
Pita bread does dry out quickly and doesn’t keep well in the refrigerator. The good thing about this recipe is that it makes 6 servings, so you likely won’t have too much pita bread left over.
But if you do have extra pita bread that you’d like to save for another time, I suggest storing it in a bread basket or paper bag in a cool, dry area of your kitchen. Pita bread at room temperature usually lasts 2-3 days.
If you’re looking for longer storage options, you can wrap the pita bread individually with plastic wrap or place a few in a freezer bag and store them in the freezer.
When you’re ready to enjoy it, you can take it out of the freezer and heat the pita in a non-stick frying pan or microwave.
How To Heat Pita Bread?
Pita bread doesn’t taste as good cold or refrigerated, but the good news is that it’s easy to heat up! You can quickly heat pita bread in the microwave using a microwave-safe dish. It will get more doughy than crispy, but in about 15 seconds, you’ll have ready-to-eat pita bread.
Alternatively, you can reheat the pita in a nonstick frying pan. Heat a little bit of olive oil in the pan and place the frozen pita bread in the warmed pan. It will only need a minute or two on each side.
- Easy Greek Tzatziki Sauce Recipe
- Easy Oven Baked Greek Tofu Recipe
- Easy Greek Side Dishes To Serve With Gyros
- Quick Spicy Feta Cheese Dip (Tirokafteri)
- Greek Style Marinated Octopus
- One-Pan Greek Cod Recipe (Quick and Easy)
Super Simple Pita Bread Recipe (No Yeast)
Ingredients
- 2 ½ cups all-purpose flour
- 1/4 cup all-purpose flour for dusting
- 1 ¼ cups buttermilk lukewarm
- 1 ½ tablespoons extra virgin olive oil for the pita dough
- 1/2 teaspoon white granulated sugar
- 1 teaspoon salt
- 1/2 teaspoon baking soda
- About 3 tablespoons of extra virgin olive oil to use when cooking the pita bread and brushing the cooked pita
- Dried oregano to sprinkle on top optional
- Salt flakes to sprinkle on top optional
Instructions
- Mix all of the dry ingredients together (flour, sugar, salt, baking soda) in a large bowl and set aside.
- Heat the buttermilk in the microwave or in a small saucepan until it's lukewarm.
- Transfer the lukewarm buttermilk to a mixing bowl. Add in the olive oil. Using an electric stand mixer with a dough hook attachment slowly add the flour mixture to the buttermilk and mix on a low-medium speed for about 2-3 minutes or until the dough is mixed.
- Remove the dough from the mixing bowl and knead it into a ball. Place the dough inside a lightly oiled bowl. Cover the dough with a clean kitchen towel and let the dough rest for 15 minutes at room temperature.
- Prepare a clean surface, such as a countertop or table, and lightly flour it. Remove the dough from the bowl and knead it on the floured surface. Cut the dough into six pieces and roll into balls.
- Roll the dough balls into a flat circle using a rolling pin.
- Heat up about 1 teaspoon of olive oil in a non-stick frying pan. Place the pita bread into the nonstick pan and cook for 1-2 minutes on each side on medium heat.
- Repeat this process until all the dough is used. Wrapped the cooked pita bread with a clean cloth or aluminum foil while the remaining pita bread cooks so that it can stay warm.
- Brush the cooked pita bread with a little bit of olive oil or melted butter and sprinkle with dried oregano and sea salt.
Notes
- Buttermilk is acidic and an important ingredient because it activates the baking soda.
- Allowing the dough to rest for 15 minutes will make it easier to roll the dough into circles.
- The thinner the pita bread when you're rolling out the dough, the crispier your pita bread will be.
- Keep an eye on the pita bread when you're cooking it so that it doesn't burn. It only needs about a minute or two on each side!
Nutrition
Date Published: February 14, 2022


Super Simple Pita Bread Recipe (No Yeast)
VIEW THE COMMENTS